

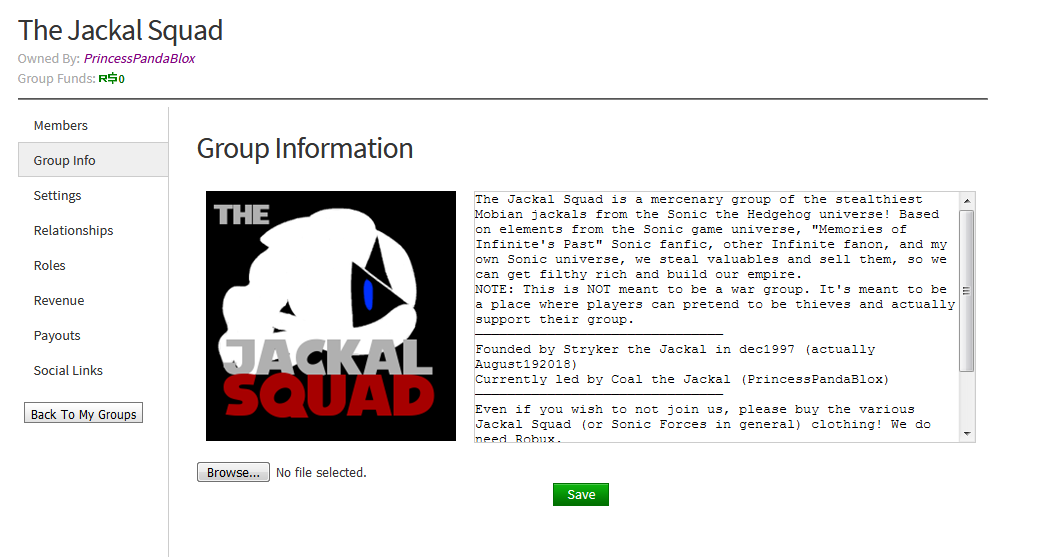
The old Group Admin page, with the "Group Info" tab open
The Configure Community (formerly known as Configure Group and Group Admin) page allows you to change groups' settings. Members with higher ranks, which allow them to have certain authority, are able to see and change these settings.
Group information
At the top of the Information section are the settings to change the Emblem and Description. Group Images go through moderation, to ensure they follow the Roblox Community Standards. Group Descriptions are usually something that defines what a group is about.
Below this, group owners can appoint a new group owner. To do this, they must type in a name and hit 'Make Owner'. Then, they must preform 2-step verification. After that, an owner would repeat their previous action. Then, the former owner will become a member and the newly appointed user will become the owner.
Right below the Make Owner settings, the group name can be also changed for 100 Robux once every 90 days. After 90 days, the old group name will be recycled and will be available for reuse.
Members
This panel lets users tweak the user settings. A list of all the different users, as well as the ability to change their rank, can be seen. If someone with the appropriate permissions wishes to change their rank, they must click on the dropdown menu and select their new rank. There is also a red Exile User button under their name. This kicks the user from the group.
Join requests
If you have group joining set to Manual Approval you'll see a list of people who want to join your group. You get to see their username, if they have Premium, when they asked to join and big buttons to accept or decline them.
Up at the top was a search bar. If you have a specific friend who you asked to join, you can look for their requests using that search.
At the bottom of the list were two big Accept ALL and Decline ALL buttons. They do exactly what they say, either allow all the requests in or deny all the member requests.
The four default ranks
When the group's creator first creates the group the group is given four different ranks by default which can later be changed by either editing the name of the rank or simply adding more ranks
- Guest "a non-group member."
- Member "a regular group member."
- Admin "group administrator."
- Owner "the group's owner."
Settings
This is a list of basic settings given the owner and some ranks of the group
Require Approval
- Anyone can join -Makes it so people can join without approval
- Manual approval -Makes it so only selected members can accept new members
Entry Qualifications
- User must have Premium - Premium only members can join
Miscellaneous
- Allow enemy declarations -Allows other groups or your own group to declare another group an enemy when enabled
- Group funds are publicly visible -Any member or non-member can see the groups profit
- Group experiences are visible on the group home page -If the group has any experiences or places they can be added to the group's front page
Rank settings
At the bottom of the page is the Rank Settings menu. This might look a little complex, but it's actually pretty simple.

1. Name and Description
This is what the name of each rank will have. Click the Create button to make a new blank rank (each rank costs 25 Robux).
2. Rank Number
The Rank Number is where the rank is compared to other ranks. The higher the number, the higher the rank. Guests are the lowest, at 0 and Owners are the highest, at 255. Other ranks can be spread out through here. Normally the more permissions you have the higher rank you are. Rank numbers also define who can promote who, given the proper permissions.
3. Rank Settings
This is where things get interesting.
A rank level can have individual permissions set, for example in this picture only the Owner and Admin can delete posts on the group wall (purple). Look at the 4. Legend to see what permission is what.
Remember that Guests are any random people who visit your Group page. So it might not be a good idea to let them all post on the Group Wall, but it would be good to let them see the wall.
Another note is that the names should probably mean something. Naming the people who can do almost anything 'Admins' makes sense, but naming them 'CARL' and your regular Members 'JOHN' both doesn't make sense and can be terribly confusing. But hey, it's your group, name them what you want.
4. Legend
The legend is used to tell us what each checkbox does, and how it affects. For example, it tells us that if we select the box underneath purple, that rank will be able to delete posts on the group wall.
New roles are now free to create (previously 25 each).
Affiliates
Affiliates (formerly Relationships on Group Admin) is the section of the Configure Group page that allows users to choose who to be affiliates with the group. Users can choose to have allies or enemies, which requires enemy declarations to be enabled in the settings section.
Sending an affiliate request
Users can declare affiliates with other groups by going to configure group, clicking affiliates and selecting the type of affiliation, then clicking "Send (Ally/Enemy) Request," then searching the name of the group you wish to send an affiliate request to in the search bar.
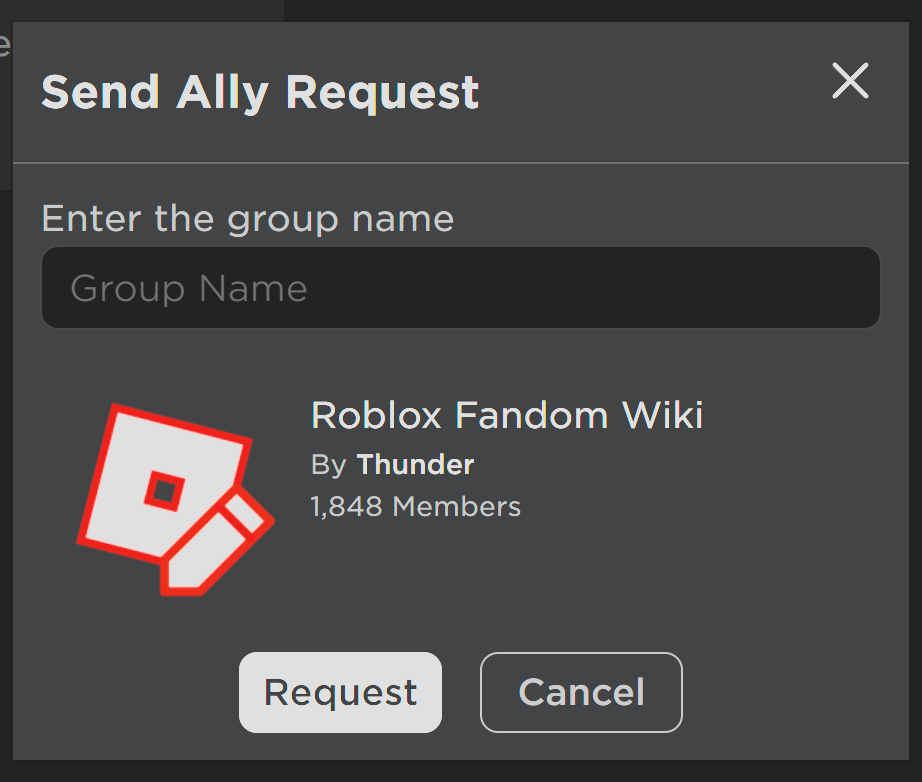
When you are done, press the "Request" button. You will have to wait for the other group to accept your request.
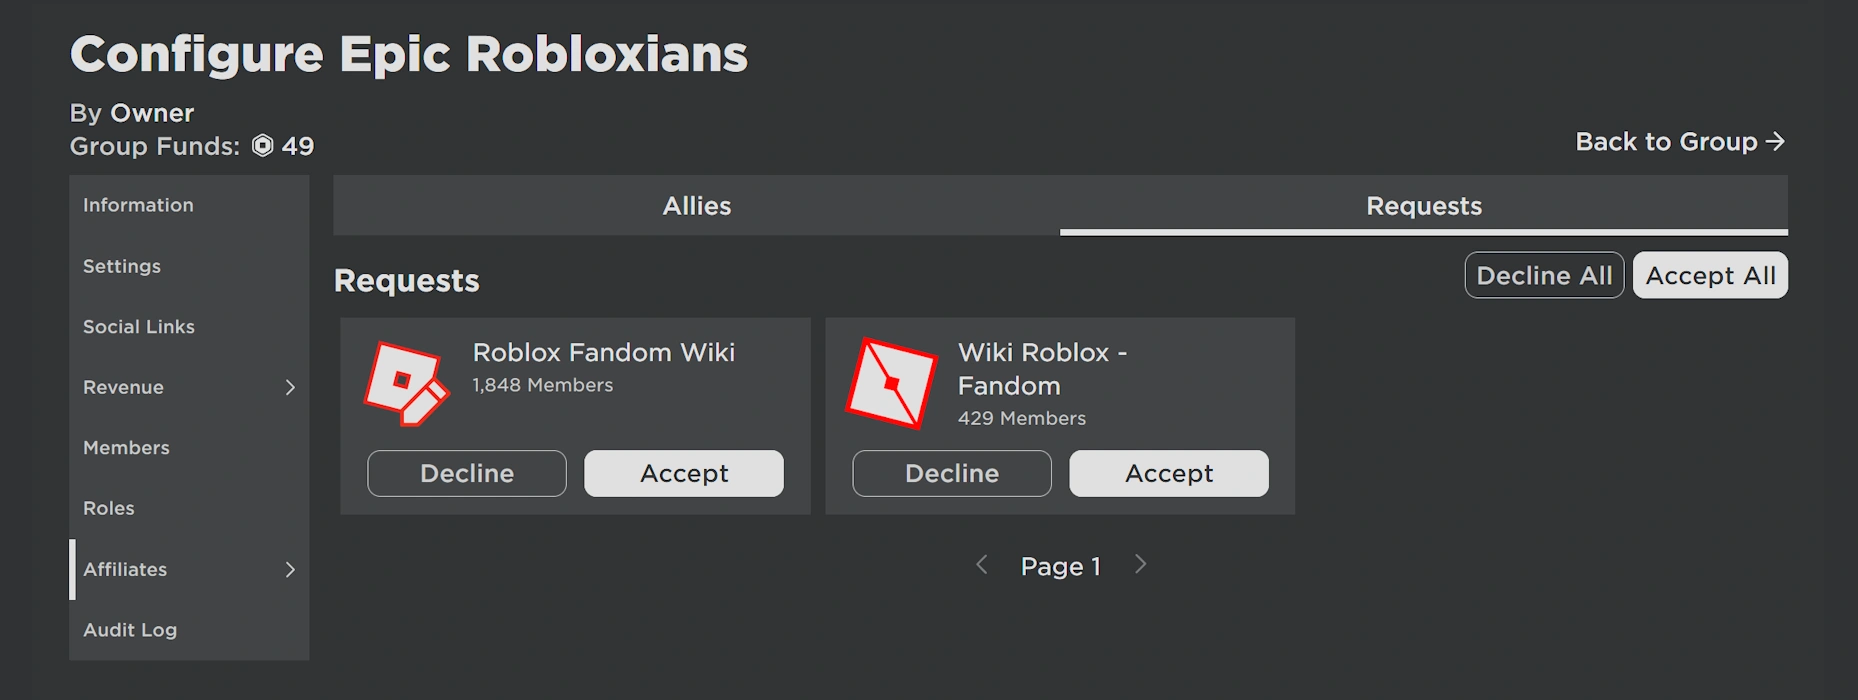
Receiving an affiliate request
Users can easily accept an affiliate request from another group by going to the configure group panel, clicking affiliates on the sidebar, and selecting the type of affiliation. Then going to the Requests tab and choosing the groups they wish to be affiliates with by either choosing to decline or accept the affiliate request.
Revenue
The Revenue configure group feature allows all groups sales to be measured such as shirts and passes sold in-experience. payout
Payout
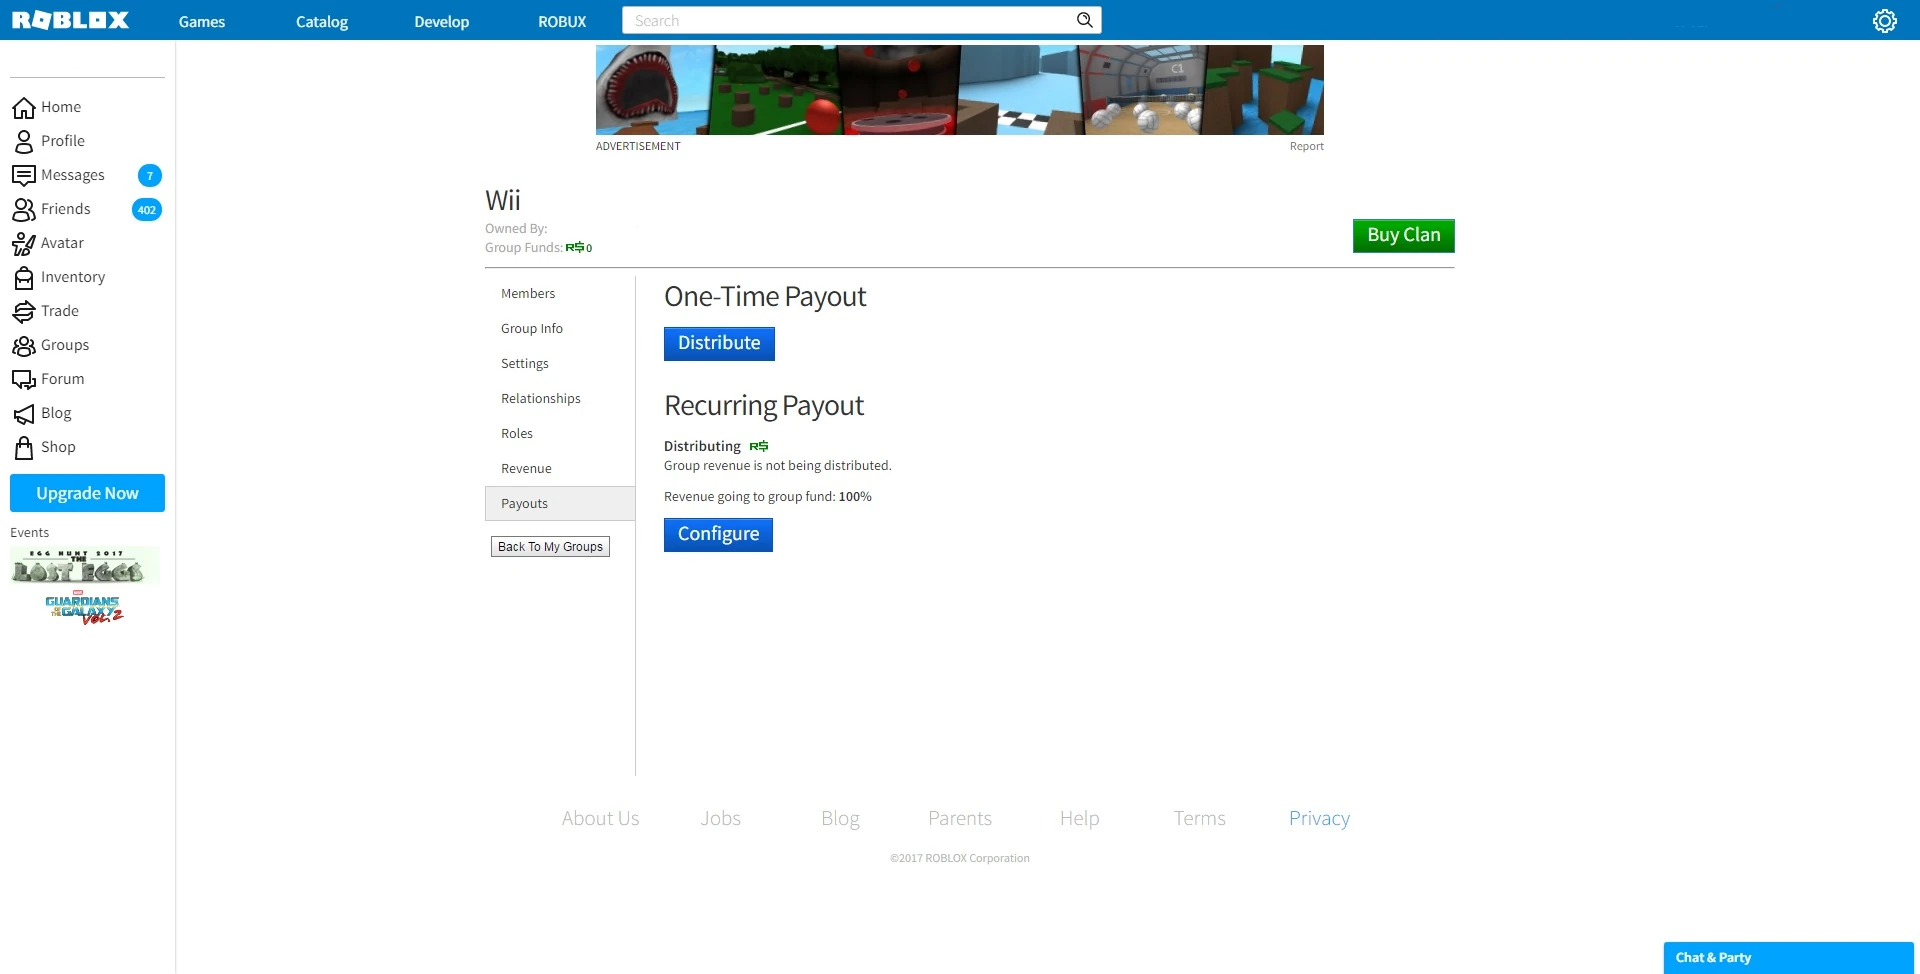
The payout options gives the admins two options
One-time Payout
This option allows the admins to have the ability pay any member one time with Robux which is gain by revenue earned by the group's products.
Recurring Payout
This option allows the admins to send out payments on a timely schedule to the selected members this function is the same a one-time payout but it's continuous, unlike one-time.
Gallery
")
")
")
")
")